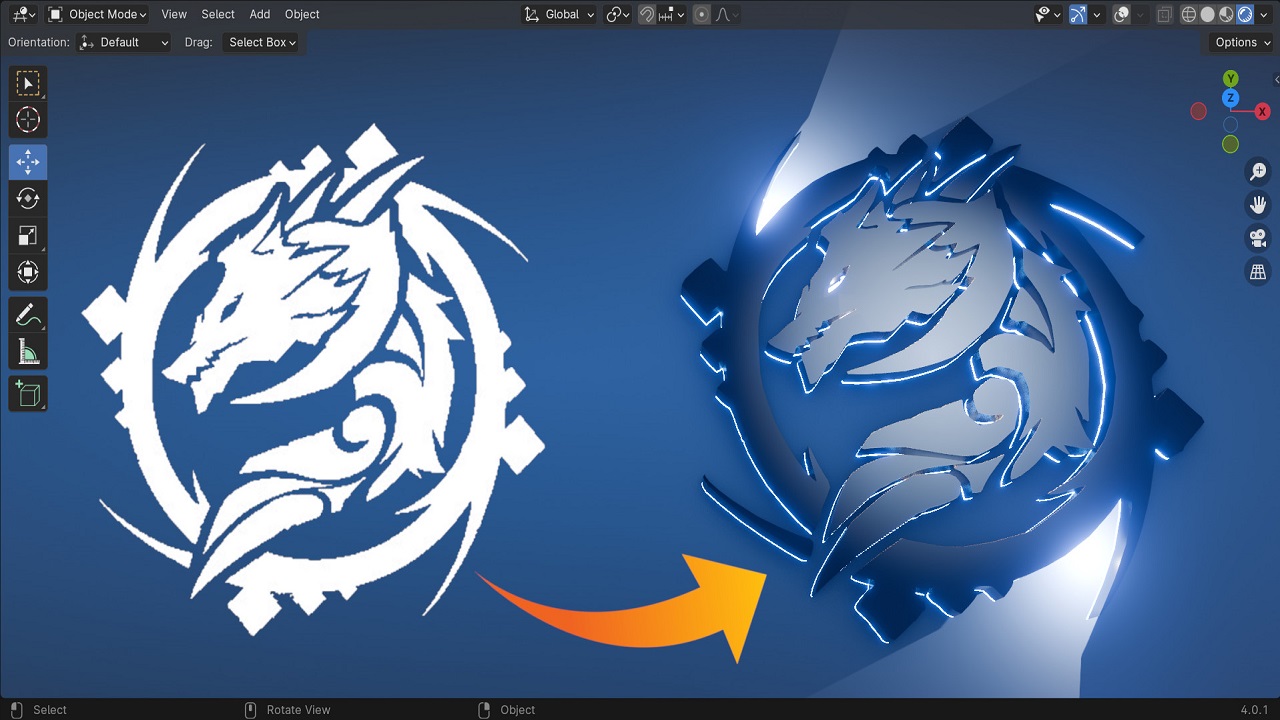
Turn Any 2D Image to 3D Model: A Quick & Easy Blender Tutorial for Beginners
In this tutorial, we’ll transform a 2D dragon logo into a 3D model using Blender. We’ll cover importing the image, converting it to a 3D model, and texturing the final result.
1. Import and Prepare the 2D Image
- Delete Default Objects
- Start by opening Blender and deleting the default objects.
- Import the Dragon Logo
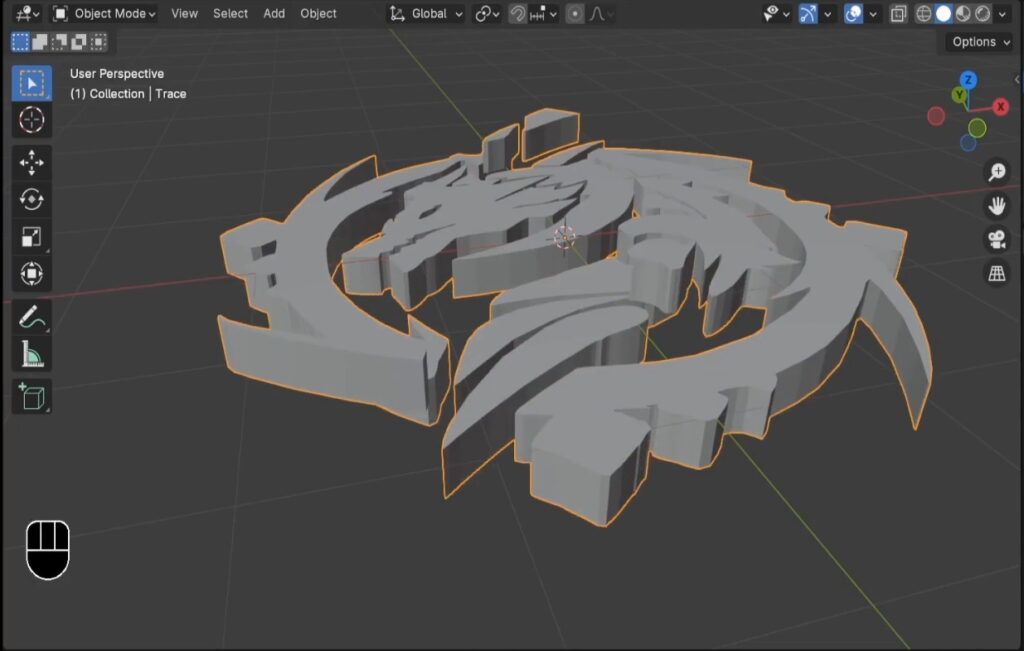
- Drag and drop your dragon logo image into Blender’s 3D viewport. Center it using the transform tools.
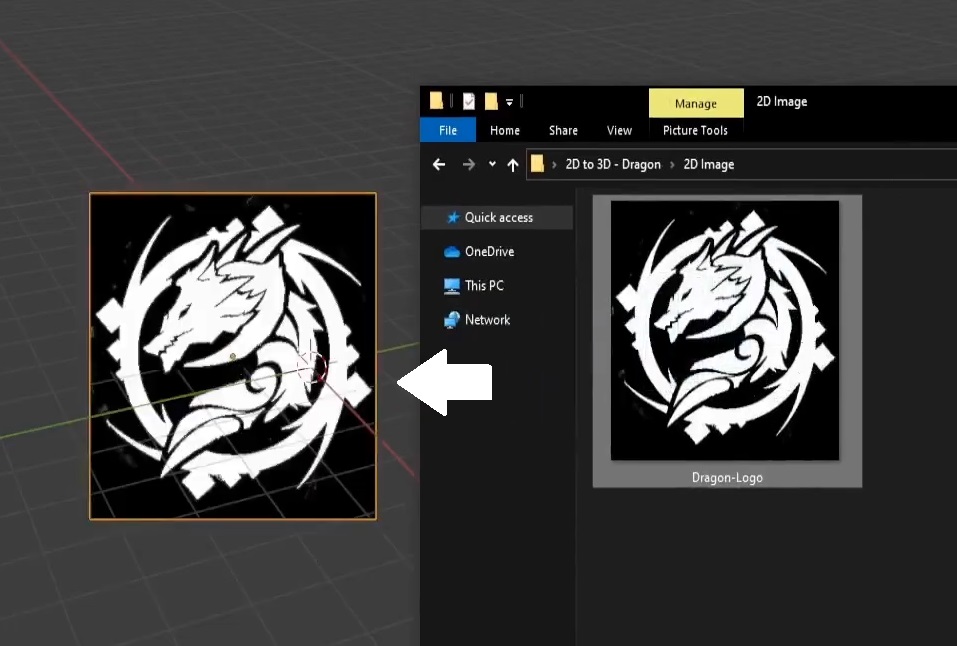
Screenshot: Imported dragon logo image in the 3D viewport.
- Convert Image to Grease Pencil
- Right-click the image and select “Trace Image to Grease Pencil.” Adjust resolution as needed.
- Clean Up the Grease Pencil Drawing
- Enter Edit Mode and clean up the drawing by removing unnecessary points.
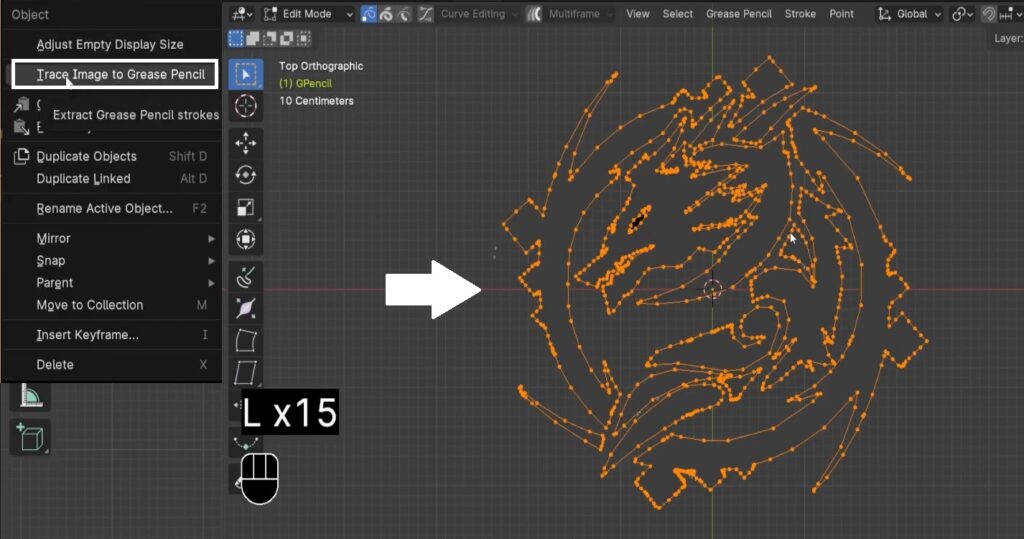
Screenshot: Grease Pencil drawing with unnecessary points highlighted for deletion.
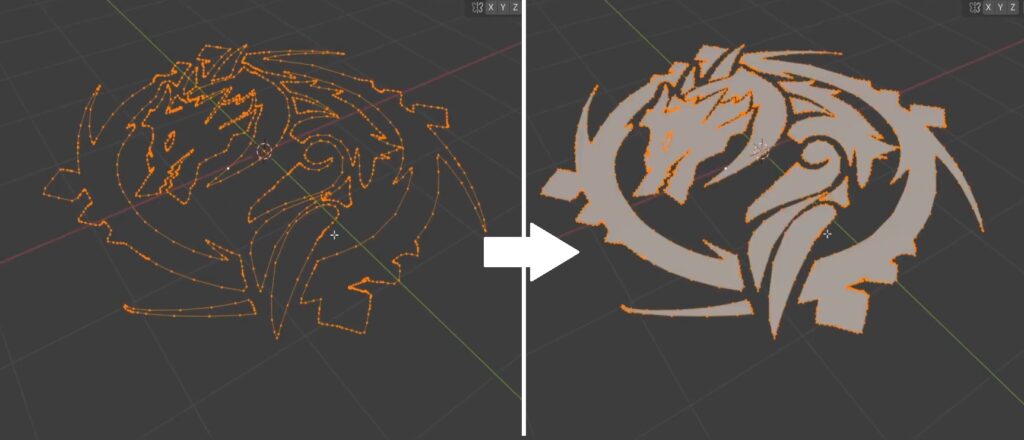
2. Convert Grease Pencil to Curve
- Convert to Curve
- With the Grease Pencil object selected, go to
Object→Convert→Curve from Grease Pencil.
- With the Grease Pencil object selected, go to
- Remove Unnecessary Grease Pencil Objects
- Delete the original Grease Pencil object, leaving only the curve.
- Optimize the Curve
- Reduce the curve resolution if needed.
- Convert Curve to Mesh
- Convert the curve to a mesh by going to
Object→Convert→Mesh from Curve/Meta/Surf/Text.
- Convert the curve to a mesh by going to

Screenshot: Conversion process to Mesh with settings shown.
3. Clean Up and Detail the Mesh
- Optimize the Mesh
- In Edit Mode, use
Mesh→Clean Up→Merge by Distanceto remove duplicate vertices. - Screenshot: Mesh cleanup process, highlighting before and after results.
- In Edit Mode, use
- Fill Faces and Cut Details
- Use the
Fkey to fill faces. For any cut-outs, use the Boolean modifier to subtract shapes.
- Use the
Screenshot: Mesh with faces being filled and Boolean modifier settings.
- Add Depth with Solidify Modifier
- Apply the Solidify modifier to add thickness to your mesh.
Screenshot: Mesh with Solidify modifier settings and the resulting thickness.
- Fix Normals
- Recalculate normals by selecting faces and using
Shift + N.
- Recalculate normals by selecting faces and using
- Bevel Edges
- Apply the Bevel modifier to soften sharp edges.
4. Texture the Dragon Logo
- Add Materials
- Open the Shader Editor, create a new material, and adjust the settings for your mesh.
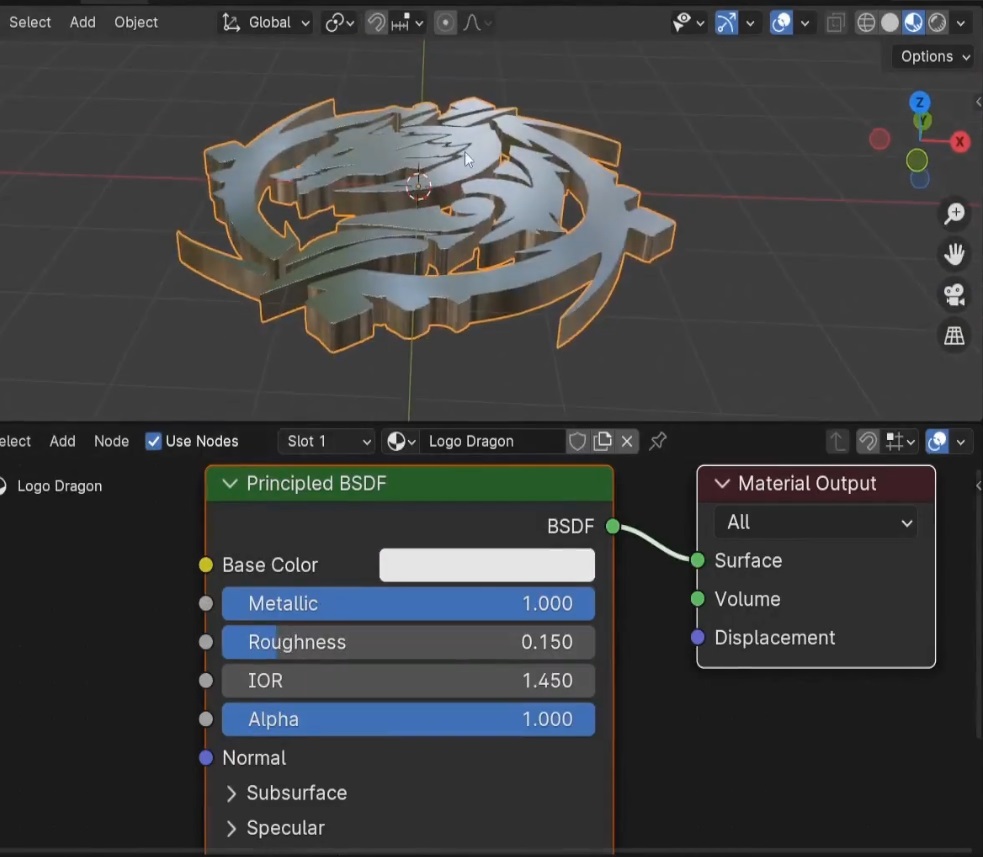
Screenshot: Shader Editor with the new material and settings.
- Add Gradient Texture
- Add and configure a Gradient Texture node to adjust the material’s appearance.
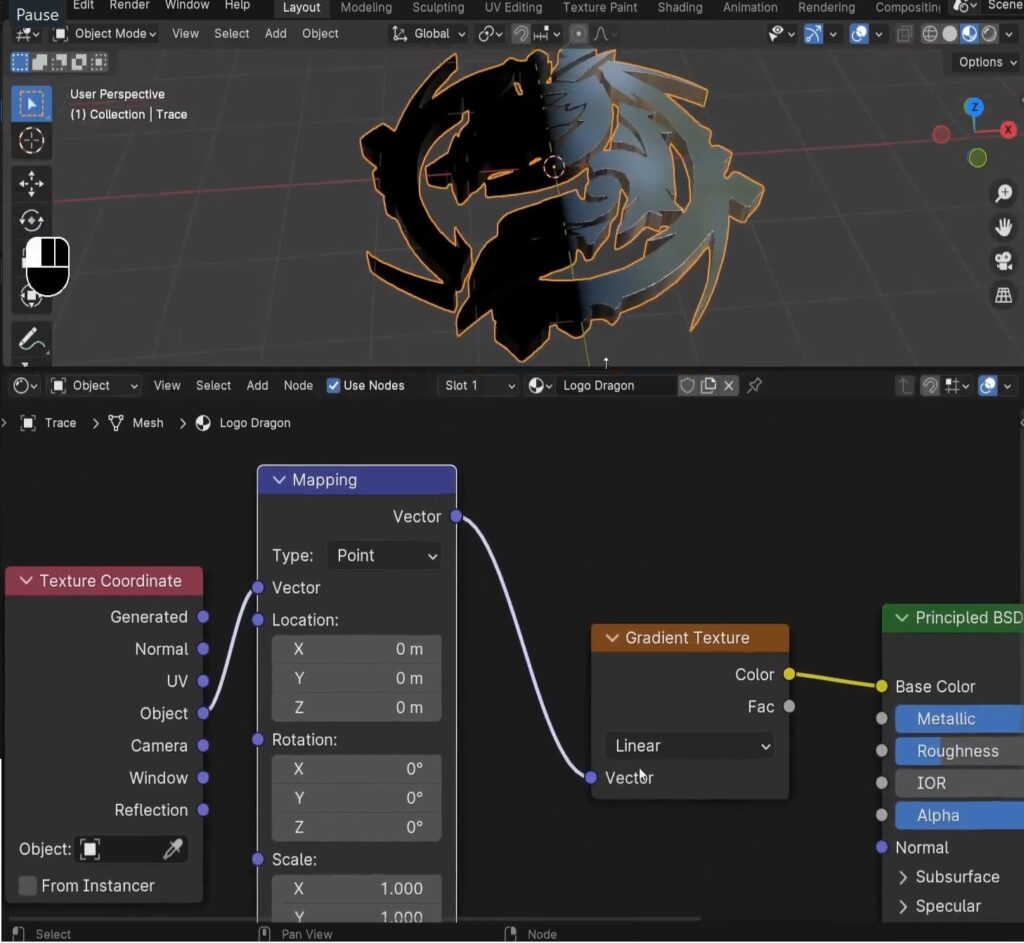
Screenshot: Gradient Texture node setup and connection in the Shader Editor.
5. Set Up Background and Lighting
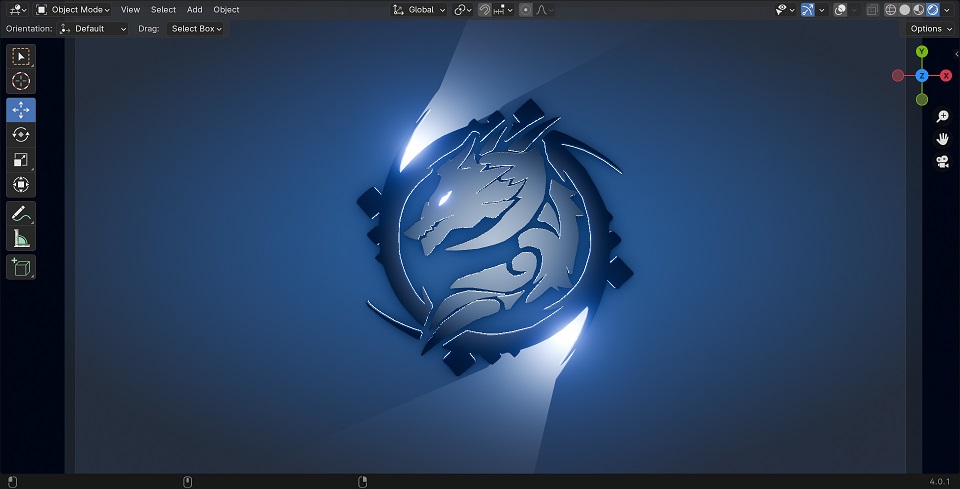
- Add Background Plane
- Create and position a background plane behind your model. Apply a material to it.
- Set Up Lighting
- Add a Sky Texture for ambient lighting and place point lights around the scene.
Download the Dragon Logo
![]()
Click the button to download the Blender Project file…
