Create a Realistic Gaming Chair – Blender Tutorial
Welcome to this comprehensive tutorial series where we will craft a realistic gaming chair from scratch using Blender. This guide is designed to take you through each stage of the process, from modeling the chair to adding textures, and finally rigging it. By the end of this series, you’ll be able to create a high-quality gaming chair that looks great in any scene.
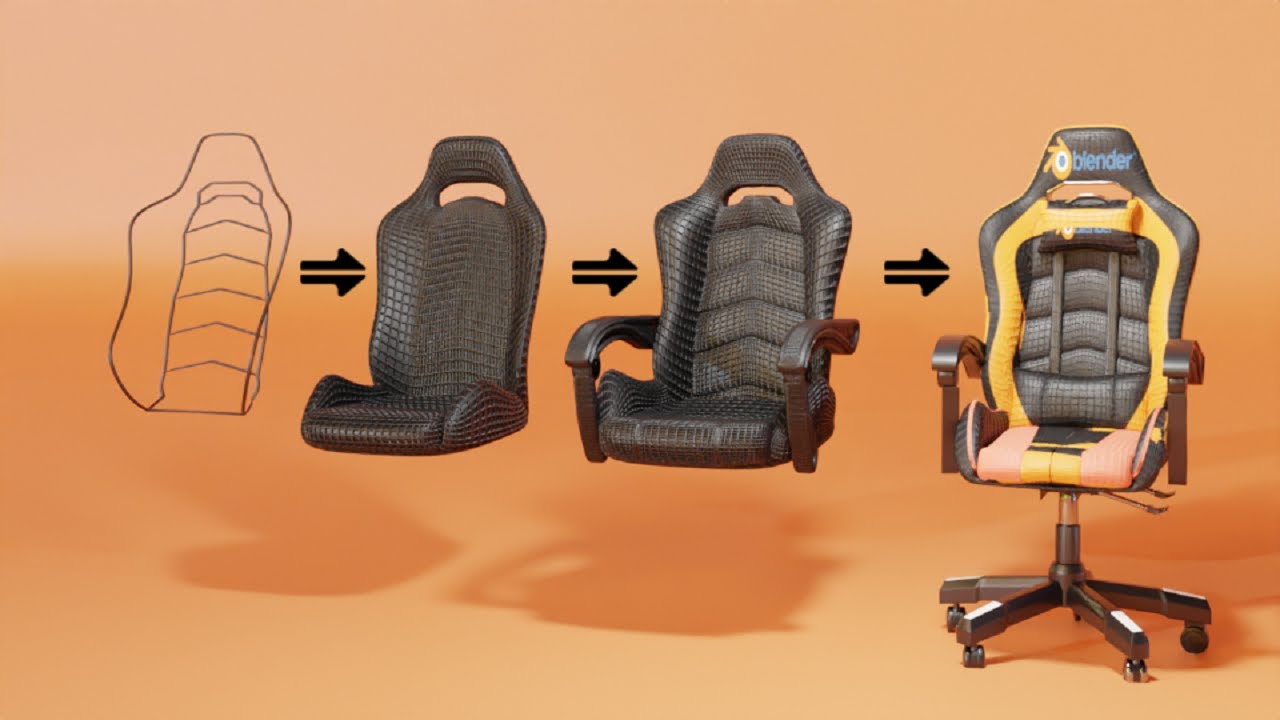
Part 1: Modeling the Gaming Chair
Setting Up the Blueprint

- Prepare the Scene
- Start by clearing your Blender scene. Press
Ato select all objects and thenXto delete them. - Import the front blueprint of the gaming chair. Drag and drop the image into your scene from the resources. Press
Nto open the properties panel, and set both the location and rotation to zero. This centers the blueprint in your workspace.
- Start by clearing your Blender scene. Press
- Adjust Blueprint Position
- Press
1to switch to the front view. Rotate the blueprint 90 degrees on the X-axis (RX 90) to align it properly. - Move the blueprint along the Z-axis (
GZ) to align the wheels with the X-axis. - Reduce the opacity of the blueprint image to around 0.75 for better visibility. Adjust its position so that the wheels are correctly aligned with the X-axis.
- Press
- Import and Adjust the Side Blueprint
- Repeat the steps for the side blueprint. Reset its location and rotation, then rotate it 90 degrees on both the X and Z axes.
- Adjust its opacity to 0.75 and position it so that it aligns with the wheels on the Y-axis.
Modeling the Chair Skeleton
- Starting with a Plane
- Press
Shift + Aand selectMesh > Plane. This plane will serve as the base for modeling the chair. - Enter Edit Mode (
Tab), select all vertices (A), and delete them (X > Vertices). You’ll be left with a single vertex.
- Press
- Extrude and Shape the Chair
- Select the vertex and use
Eto extrude along the path of the chair. Continue this process to outline the chair’s shape. - Add a Mirror Modifier to reflect your modeling across the X-axis. Check the “Clip” option to prevent vertices from moving past the center.
- Select the vertex and use
- Refining the Shape
- Press
3to switch to the side view. Use the Proportional Editing tool (O) to adjust the vertices for a smooth curvature. - Add details by selecting vertices and extruding them to form the internal structure of the chair. Use the
Fkey to fill faces and create smooth transitions between different sections.
- Press
- Adding Subdivision Surface
- Add a Subdivision Surface Modifier to smooth out the mesh. Increase the viewport and render levels to add more detail.
Filling Gaps and Adding Details
- Filling Faces
- Use
Fto fill gaps between edges and create a solid mesh. Add edge loops (Ctrl + R) where necessary to improve the mesh’s structure.
- Use
- Adding Depth
- Select all edges and extrude backward to give the chair depth. Adjust the depth as needed and reapply the Subdivision Modifier to check the smoothness.
- Detailing the Chair
- Insert edge loops to define sharper edges. Use the
Ctrl + Bto bevel edges for a more defined look. Adjust the geometry to ensure that all sections align properly.
- Insert edge loops to define sharper edges. Use the
Creating the Chair Top Window
- Modeling the Top Window
- Select the top faces of the chair and duplicate them. Use the
Shift + Dshortcut and separate the selection (B). - Add a Solidify Modifier to give the duplicated object depth, and then apply a Bevel Modifier to smooth the edges.
- Select the top faces of the chair and duplicate them. Use the
- Adding a Decorative Strip
- Insert a new edge loop and adjust its position to match the reference images. Convert this strip into a curve, then adjust its depth in the Curve Properties tab.
Modeling the Chair Base
- Creating the Base
- Start with a new plane and divide it into sections. Merge it with the existing chair model to inherit modifiers.
- Adjust the base’s shape by extruding and aligning edges according to the blueprint. Use edge loops to refine the base’s geometry.
- Adding Handles
- Use the side blueprint as a reference. Create handles by extruding vertices and adjusting their positions to match the blueprint’s details.
Conclusion
With these steps, you’ve now modeled a realistic gaming chair in Blender from scratch! I hope you found the process informative and that you’re excited about applying these techniques to your own 3D projects.
Realistic 3D Gaming Chair (Fully Rigged)
For those of you who want to skip the modeling process or need a fully rigged gaming chair ready to go for your scenes, I’ve made my own realistic, fully rigged gaming chair available on BlenderMarket. You can check it out here. It’s a professionally built, ready-to-use asset that you can easily integrate into your projects.
🎨 Fully Customizable: Your Chair, Your Style :
Personalization matters. This Gaming Chair asset comes with a easy to change color customization feature. Match your chair & pick any color combination for your personal style – You’re in control.

🕹️ Fully Rigged & Ready for Animation:
This gaming chair is fully rigged, allowing you to effortlessly adjust its position, rotation, and tilt – just like a real chair! Whether it’s an esports arena or a cozy gaming nook, this chair adapts to your vision.

By purchasing this asset, you’ll save valuable time, especially if you need a high-quality gaming chair for your renderings, animations, or game designs without having to start from scratch.
Buy Asset – Realistic 3D Gaming Chair
Thank you for following along, and happy modeling!
