fSpy Blender Tutorial: How to Match the Correct Scale Using fSpy (Blam Alternative)
In this tutorial, you’ll learn how to use the fSpy add-on to match the correct proportions of your reference images in Blender. This method is an excellent alternative to the Blam add-on, providing more control and accuracy.
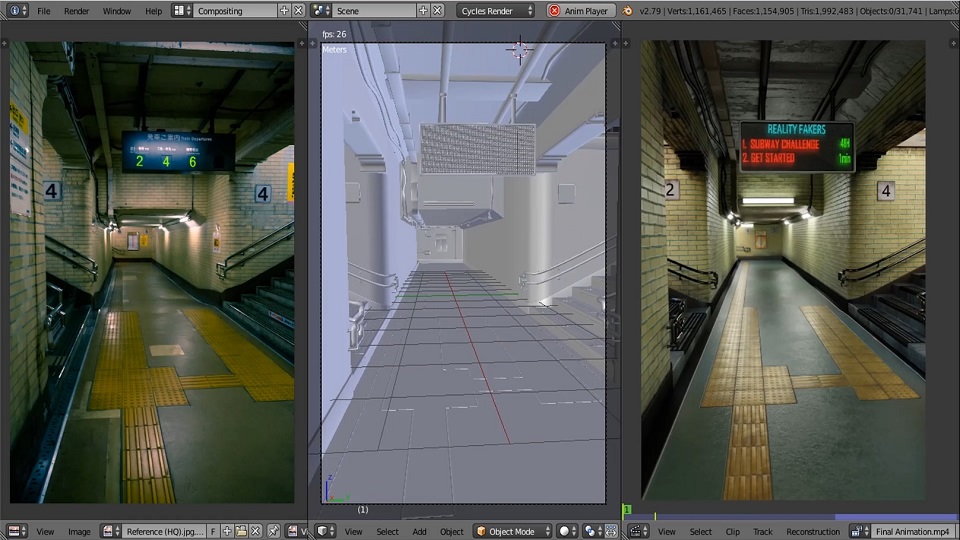
Step 1: Downloading fSpy and Blender Add-ons
First, you’ll need to download two files:
- fSpy Program – This is the main application you’ll use to set up your perspective.
- fSpy Blender Add-on – This will allow you to import your fSpy projects directly into Blender.
Screenshot: Show the download page for both the fSpy program and the Blender add-on.
Make sure you download the correct versions:
- fSpy Program: https://github.com/stuffmatic/fSpy/releases/tag/v1.0.3
- fSpy Blender Add-on: https://github.com/stuffmatic/fSpy-Blender/releases/tag/v1.0.3
Step 2: Load Your Reference Image in fSpy
Once you’ve downloaded the fSpy program, open it. Then, drag your reference image into the fSpy window. In this example, we’ll use an image of a subway.
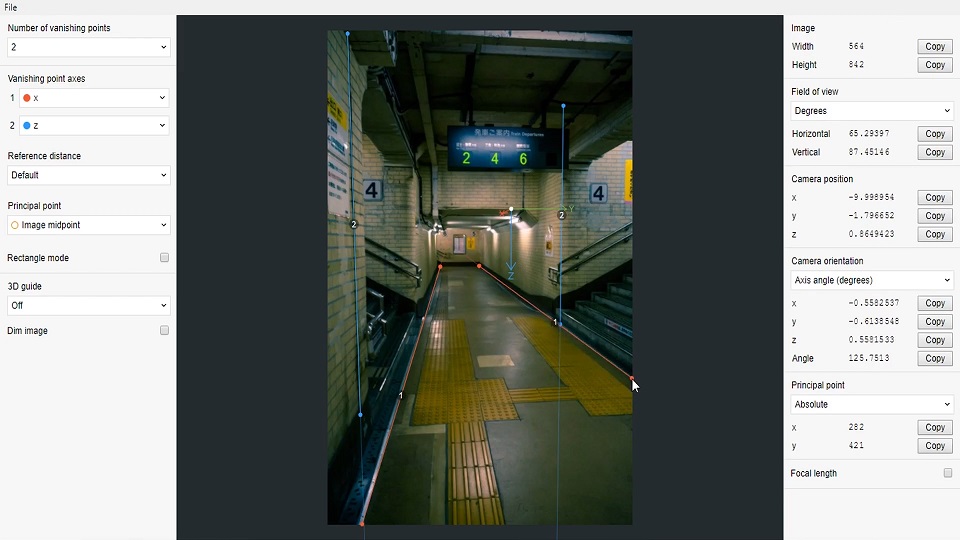
To better align your reference image, enable the option that allows you to see the image clearly.
Step 3: Set Up the Axes
In fSpy, you’ll need to define the axes of your reference image. By default, you have two axes: X and Y. However, for this tutorial, we’ll change the Y-axis to the Z-axis, which will represent vertical lines in Blender.
- Z-axis: This represents the vertical lines.
- X-axis: This remains as the horizontal axis.
Align the axes with the lines in your reference image. For example, you can follow the lines of bricks or other distinguishable features in the image.
Step 4: Save Your fSpy Project
Once you’ve set up your axes, save the fSpy project by selecting “Save As.” Name your file appropriately (e.g., subway) and hit save.
Step 5: Install the fSpy Add-on in Blender
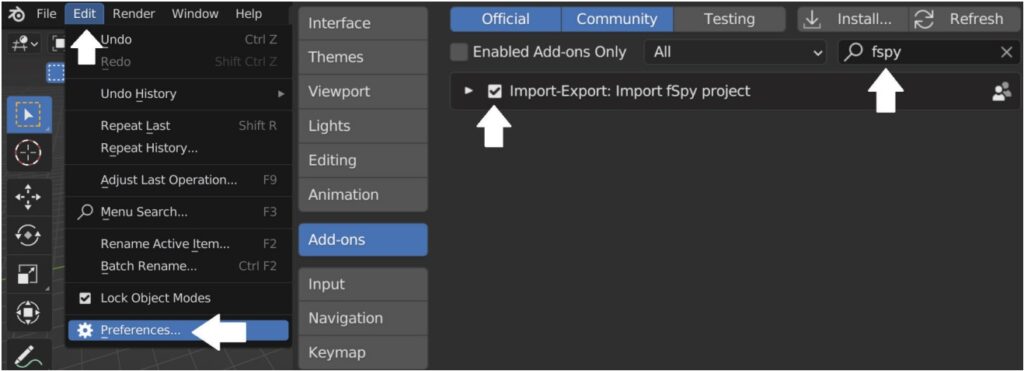
Now, let’s move over to Blender. Before importing the fSpy project, you need to install the fSpy add-on. Follow these steps:
- Go to
Edit > Preferences. - Click on
Add-onsand thenInstall. - Navigate to the fSpy Blender add-on zip file you downloaded earlier and select it.
- Search for “fSpy” in the add-ons search bar and enable it.
Step 6: Import the fSpy Project into Blender
With the add-on installed, you’re ready to import your fSpy project into Blender.
- Go to
File > Import > fSpy. - Select the fSpy project file you saved earlier (e.g.,
subway.fspy). - Your reference image should now be correctly aligned in Blender.
Step 7: Building a Detailed Subway Scene with fSpy
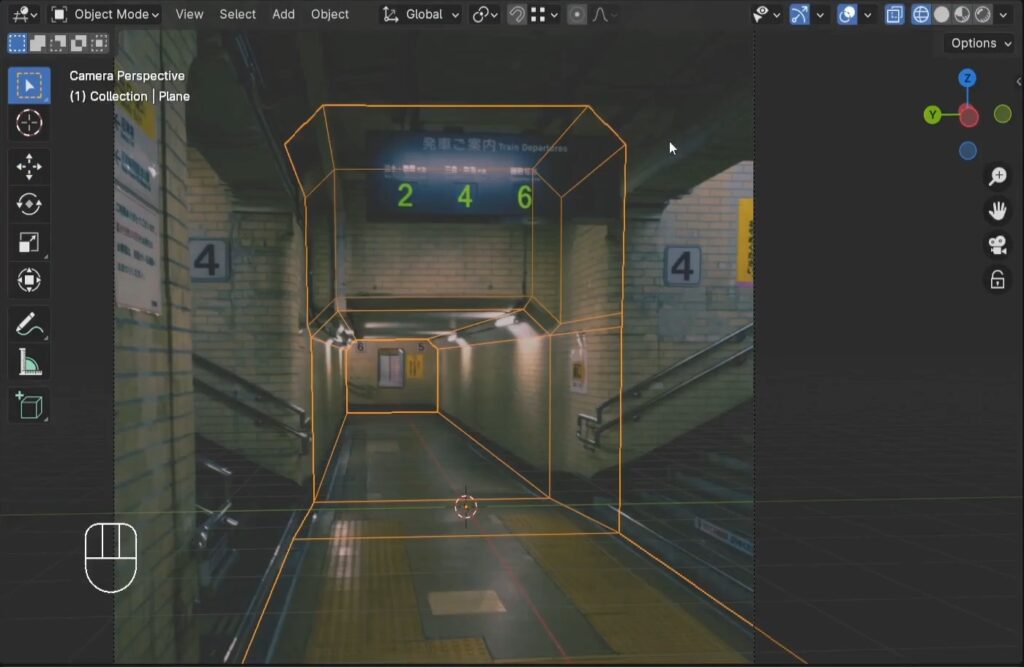
With the reference image correctly set up, you can now adjust your 3D model to match the scale. Start by adding a cube and entering Edit Mode. Switch to Wireframe mode to see through the model.
- Drag the cube’s vertices to match the dimensions of the reference image.
- Add edge loops to create additional geometry where needed.
- Use the
Extrudetool to extend parts of the model to match the reference.
Take Your Skills Further: Build a Complete Subway Scene in Blender!
In this tutorial, you’ve mastered using the fSpy add-on for precise scale matching in Blender. Ready for more?
Join our course to learn how to:
- Model the entire subway scene.
- Texture with realistic materials.
- Light your scene for a perfect atmosphere.
- Animate a walk-through of the subway.
By the end, you’ll create a stunning, fully realized 3D subway scene.
Enroll now
Take your Blender skills to the next level!
