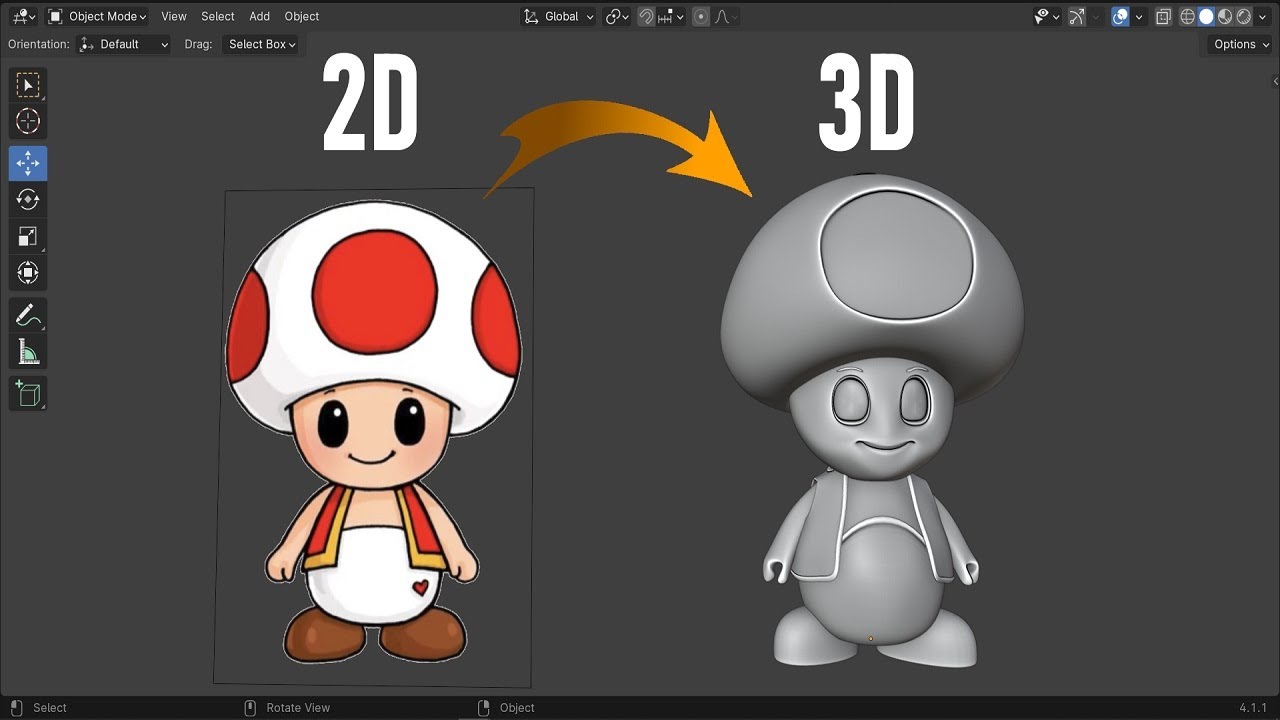
Blender Image to 3D Model – Beginner Tutorial
Creating a 3D character in Blender can be a rewarding process. In this tutorial, we’ll take a 2D reference image and transform it into a 3D character model. Follow these steps to bring your character to life!

Step 1: Importing the 2D Reference Image
- Clear the Workspace: Start by deleting everything in the scene. Press
Ato select all objects and thenXto delete them. - Align the View: Press
1on the numpad to switch to the front view. - Import the Reference Image: Drag and drop your reference image into the Blender workspace. Center it on the grid to align it properly.
Step 2: Creating the Base Shape
- Add a Plane: Press
Shift + Ato add a new mesh and selectPlane. - Enter Edit Mode: Press
Tabto switch to Edit Mode. - Delete Extra Vertices: Select a single vertex, press
Ctrl + Ito invert the selection, and thenXto delete the other vertices, leaving just one vertex. - Start Modeling: Position this vertex and begin extruding by pressing
E. Continue to extrude to match the shape of your character, working from the bottom to the top. Duplicate vertices as needed (Shift + D) to form the head and the hat.
Step 3: Using the Screw Modifier
- Align Vertices: In Edit Mode, select the vertices on one side and align them by pressing
SandX, then0. - Set Origin: Go to Object Mode and set the origin to the 3D cursor (
Shift + S> Cursor to Selected, thenObject>Set Origin>Origin to 3D Cursor). - Apply Screw Modifier: In the Modifiers tab, add a
Screwmodifier to generate the character shape. Apply the modifier and add aSubdivision Surfacemodifier for added detail. Set it to level 2.
Step 4: Refining the Model
- Adjust the Hat: Switch to the wireframe view (
Z) and use the Proportional Editing tool to adjust the hat. Ensure you’re only affecting the hat by enabling “Connected Only.” - Use the Mirror Modifier: For symmetrical characters, cut the model in half and add a
Mirrormodifier. Make sure it’s placed above theSubdivision Surfacemodifier in the stack.
Step 5: Modeling the Character’s Face
- Create Eye Sockets: In Edit Mode, select the faces where the eyes will be. Press
Ito inset, and scale the vertices to form the eye sockets. Delete the inner faces and extrude the sockets backwards. - Add Eyeballs: Add a UV Sphere (
Shift + A> Mesh > UV Sphere) for the eyes. Scale it down and position it inside the eye sockets. Smooth the shading (Right-click>Shade Smooth).
Step 6: Modeling the Mouth
- Form the Mouth: Select the appropriate faces, press
Eto extrude and shape the mouth. Use edge loops (Ctrl + R) to refine the mouth shape and add details like lips. - Adjust Mouth Shape: Use proportional editing to tweak the mouth’s appearance, ensuring it matches the reference image.
Step 7: Modeling the Arms and Hands
- Create Arm Base: Use a circle mesh to start modeling the arms. Flatten and extrude the circle to form the arm and hand shapes.
- Detail the Hands: Extrude the fingers from the hand base and shape them to look like fingers. Adjust the hand position and size as needed.
Step 8: Modeling the Feet
- Add Feet: Start with a cube. Scale and position it to match the foot shape. Use edge loops and scaling to refine the shape.
- Apply Final Adjustments: Rotate and scale the foot to fit the character’s proportions.
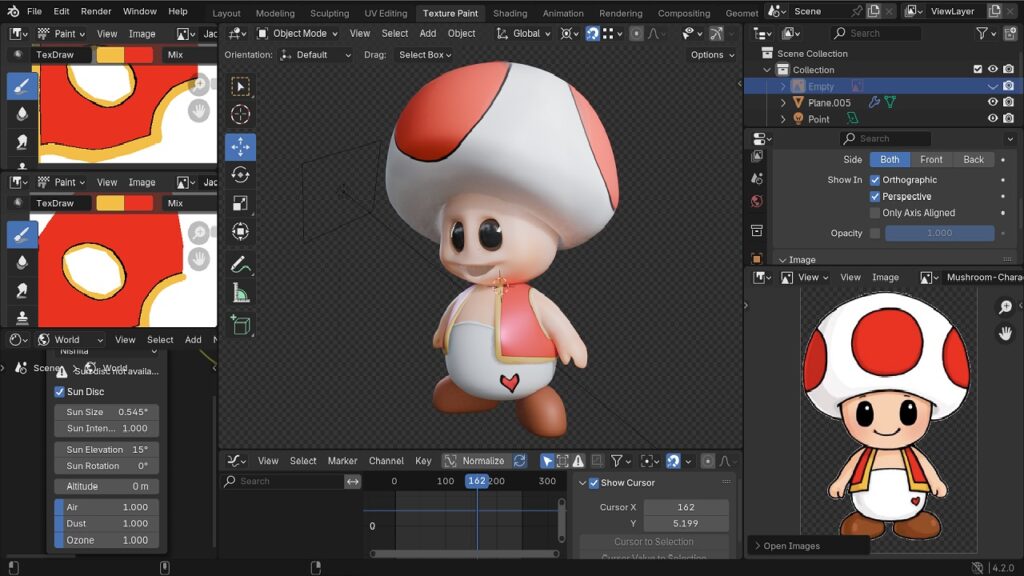
Step 9: Adding Clothing
- Create Clothing: Use additional meshes or the
Clothsimulation feature to model and drape clothing on your character. Adjust the clothing to fit your character’s body.
Conclusion
By following these steps, you’ve successfully created a 3D character from a 2D reference image in Blender. Experiment with additional details and textures to enhance your model. Happy modeling!
Click the button to start generating your download link…
