Turn Any 2D Image to 3D Model in Blender – Beginner Tutorial
Creating a 3D object from a 2D image without modeling might seem challenging, but Blender has some fantastic tools that allow you to achieve this in just a few steps. Here’s a step-by-step guide to turning your 2D image into a 3D object using Blender’s Displace Modifier. Let’s get started!
Step 1: Prepare the Workspace
Before working on the 3D object, let’s clear the default Blender scene:
- Delete Everything: Press
Ato select all objects in the scene, then pressXto delete them. - Add a Plane: Press
Shift + A>Mesh>Plane. This will serve as the base for the 3D object.
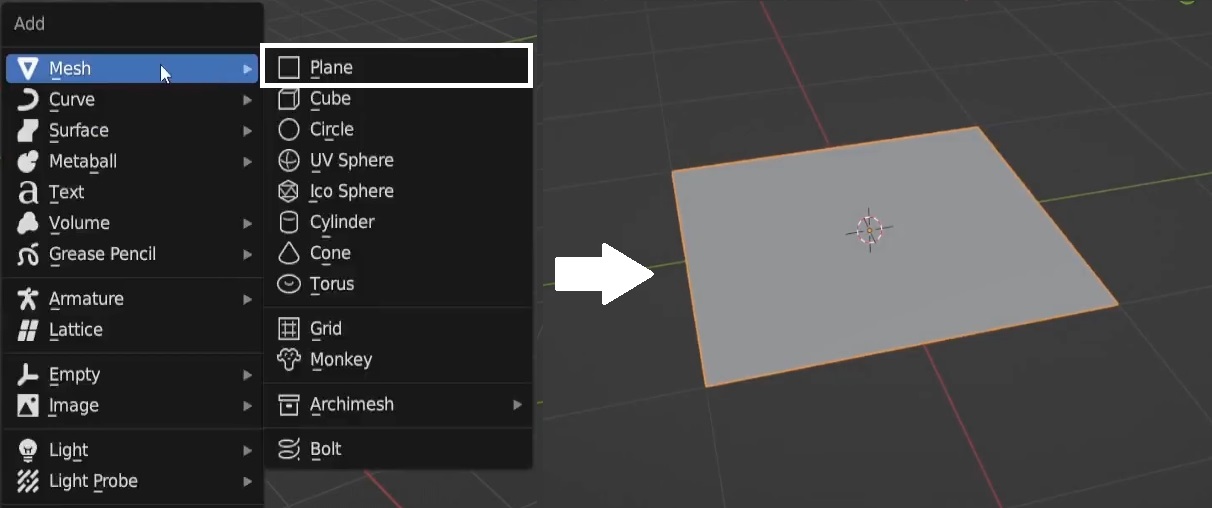
Screenshot Note: Show a clean Blender workspace with a single plane in the scene.
Step 2: Match the Dimensions of the 2D Image
Next, you need to match the dimensions of your 2D image so that the proportions of your 3D object are accurate.
- Check Image Dimensions: Right-click on your 2D image file, select Properties, and check the dimensions under the Details tab. For example, if the dimensions are
419 x 447, take note of these numbers.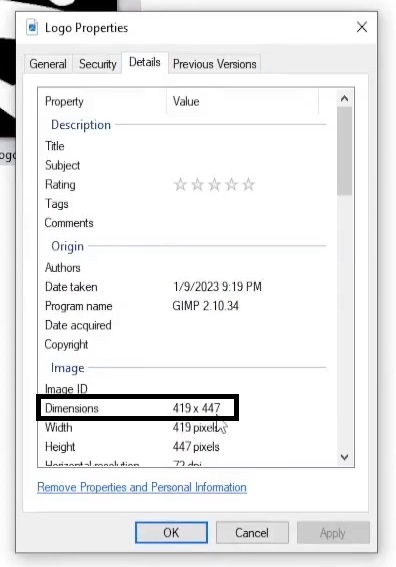 Screenshot Note: Show how to check image properties on a computer file explorer.
 - Set Plane Dimensions: In Blender, press
Nto bring up the transform panel. Under the Dimensions section, set the plane size to match the image dimensions. For instance, setXto4.19meters andYto4.47meters to keep the proportions accurate.
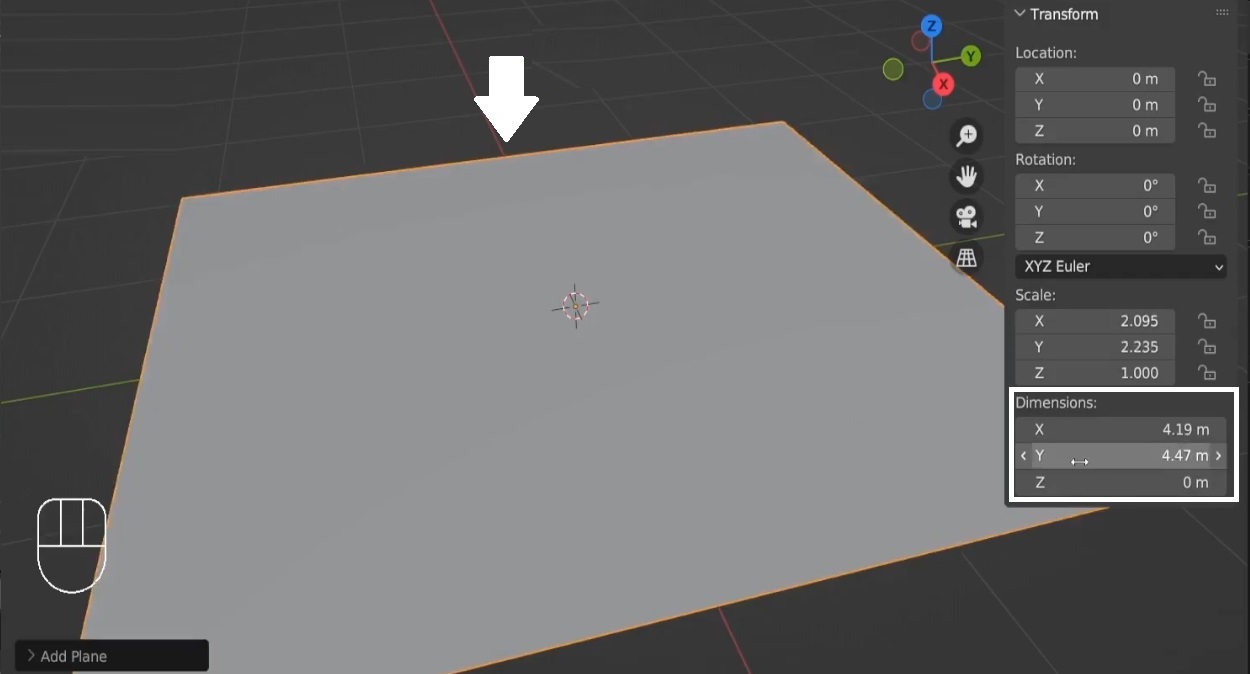
Screenshot Note: Show the dimensions being adjusted in Blender’s transform panel.
Step 3: Add the 2D Image as a Texture
Now that the plane is correctly scaled, it’s time to add the image as a texture.
![]()
- Open Texture Properties: Scroll to find the Texture Properties panel on the right-hand side.
- Add an Image Texture: Click New under the texture properties, then scroll down to the Image section and open your 2D logo or image file.
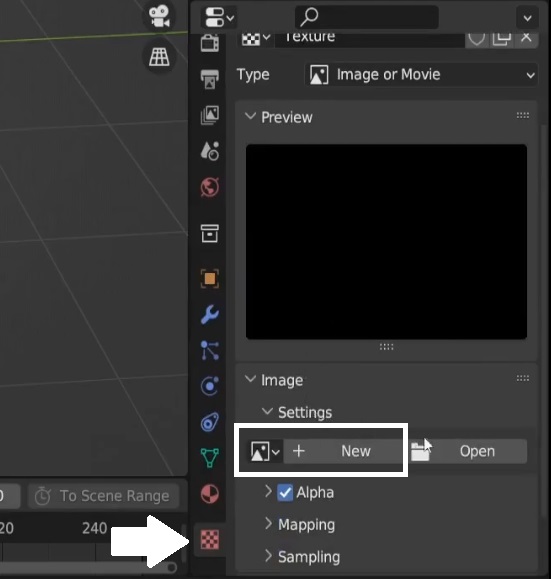
Screenshot Note: Demonstrate where to find the texture properties and how to add an image texture.
Step 4: Apply the Displace Modifier
The Displace Modifier allows us to convert the 2D texture into a 3D form by manipulating the vertices of the plane.
- Go to Modifier Properties: With the plane selected, click on the Modifier Properties tab.
- Add the Displace Modifier: Select the Displace Modifier from the list.
- Select Image Texture: Click the box next to the texture input and choose your loaded logo texture.
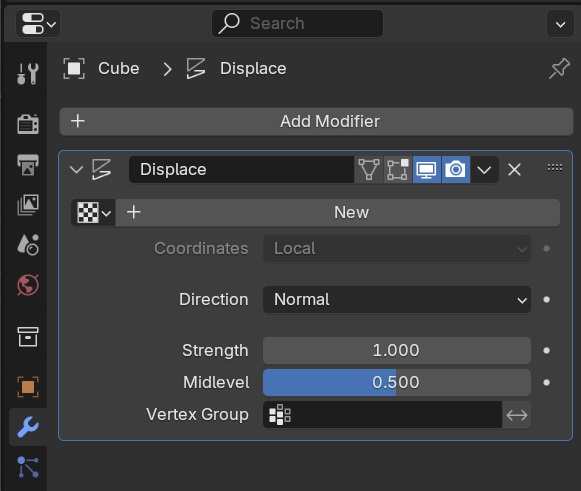
Screenshot Note: Show the displace modifier being added and how to select the texture.
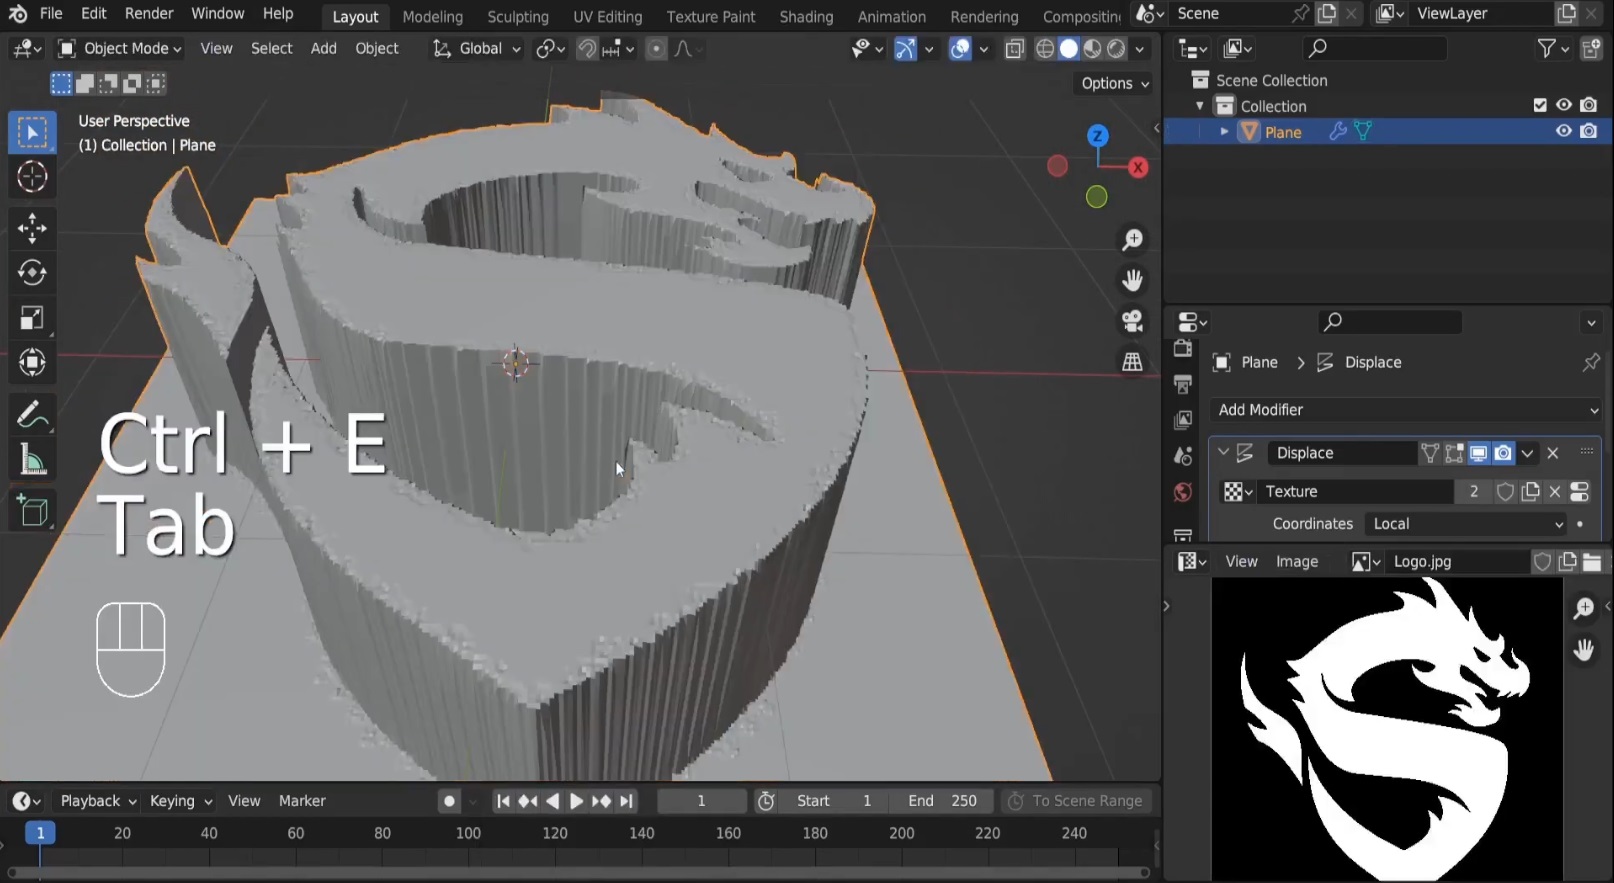
Step 5: Subdivide the Plane for Better Detail
For the displacement effect to work correctly, we need more geometry on the plane, which can be done by subdividing it.
- Enter Edit Mode: Press
Tabto enter Edit Mode and select all the faces by pressingA. - Subdivide the Plane: Press
Ctrl + E> Subdivide and increase the number of cuts to the maximum (10 cuts). This will create enough geometry for the texture to push and pull vertices effectively.
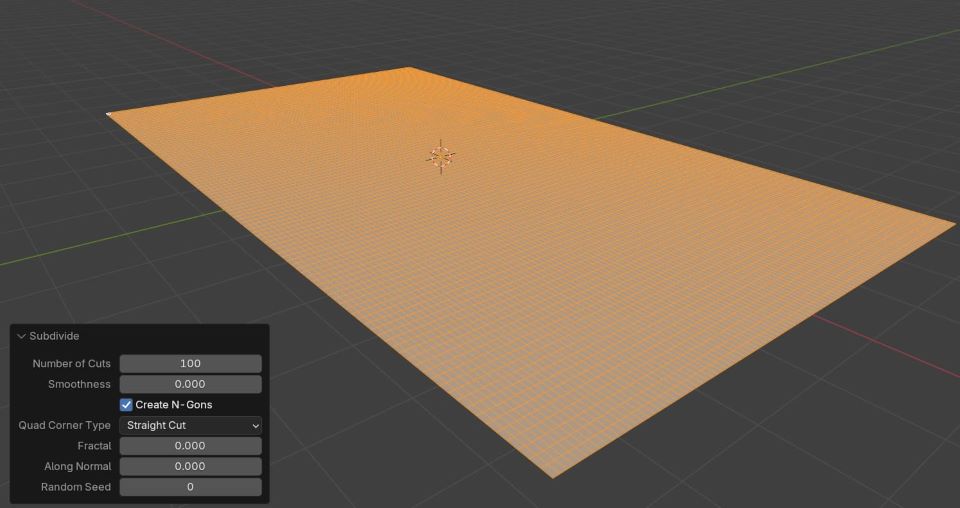
Screenshot Note: Show how to subdivide the plane in edit mode with the subdivision settings.
Step 6: Fine-Tune the Displacement
After the initial subdivision, you’ll notice the displacement effect taking shape, but it might still appear pixelated. To improve this, we need to increase the subdivisions further.
- Subdivide Again: Press
Ctrl + Eand subdivide multiple times until the displacement looks smooth. Aim for at least three additional subdivisions for optimal quality.
Screenshot Note: Show the difference before and after multiple subdivisions.
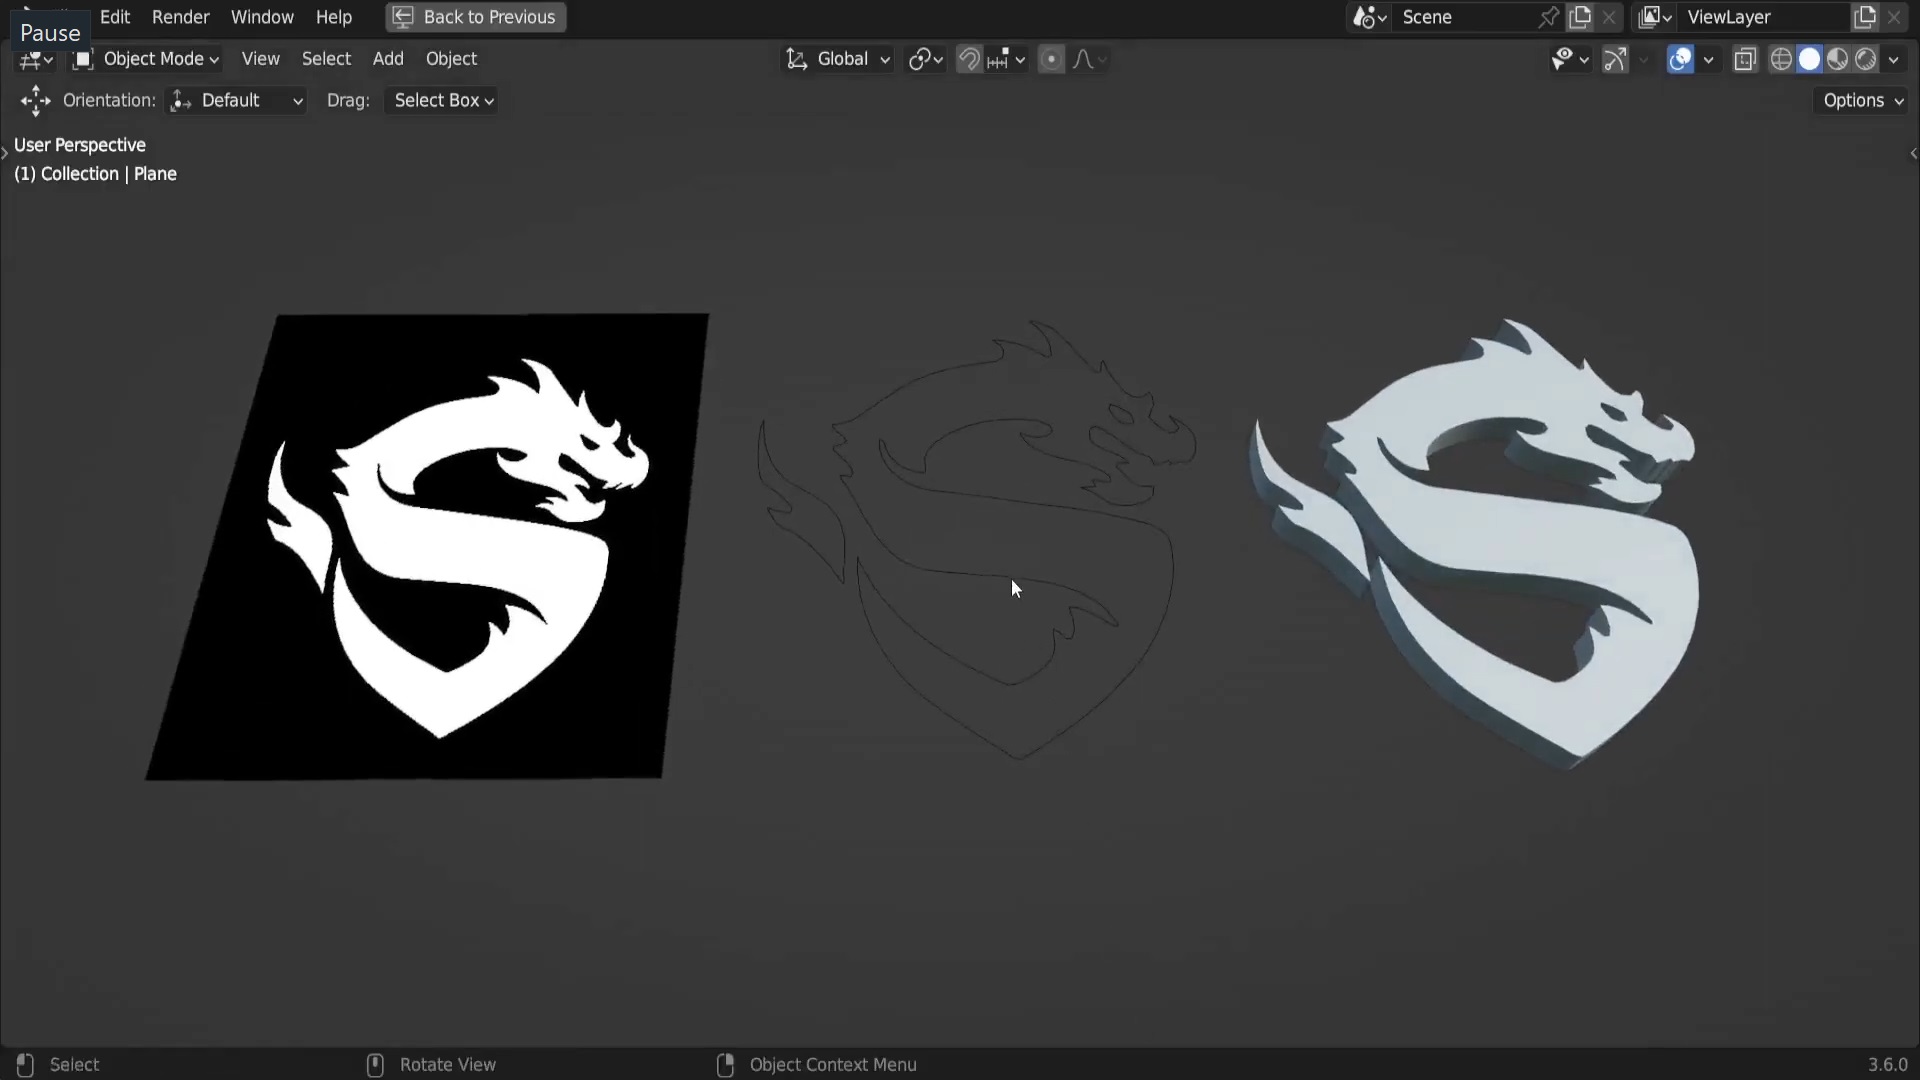
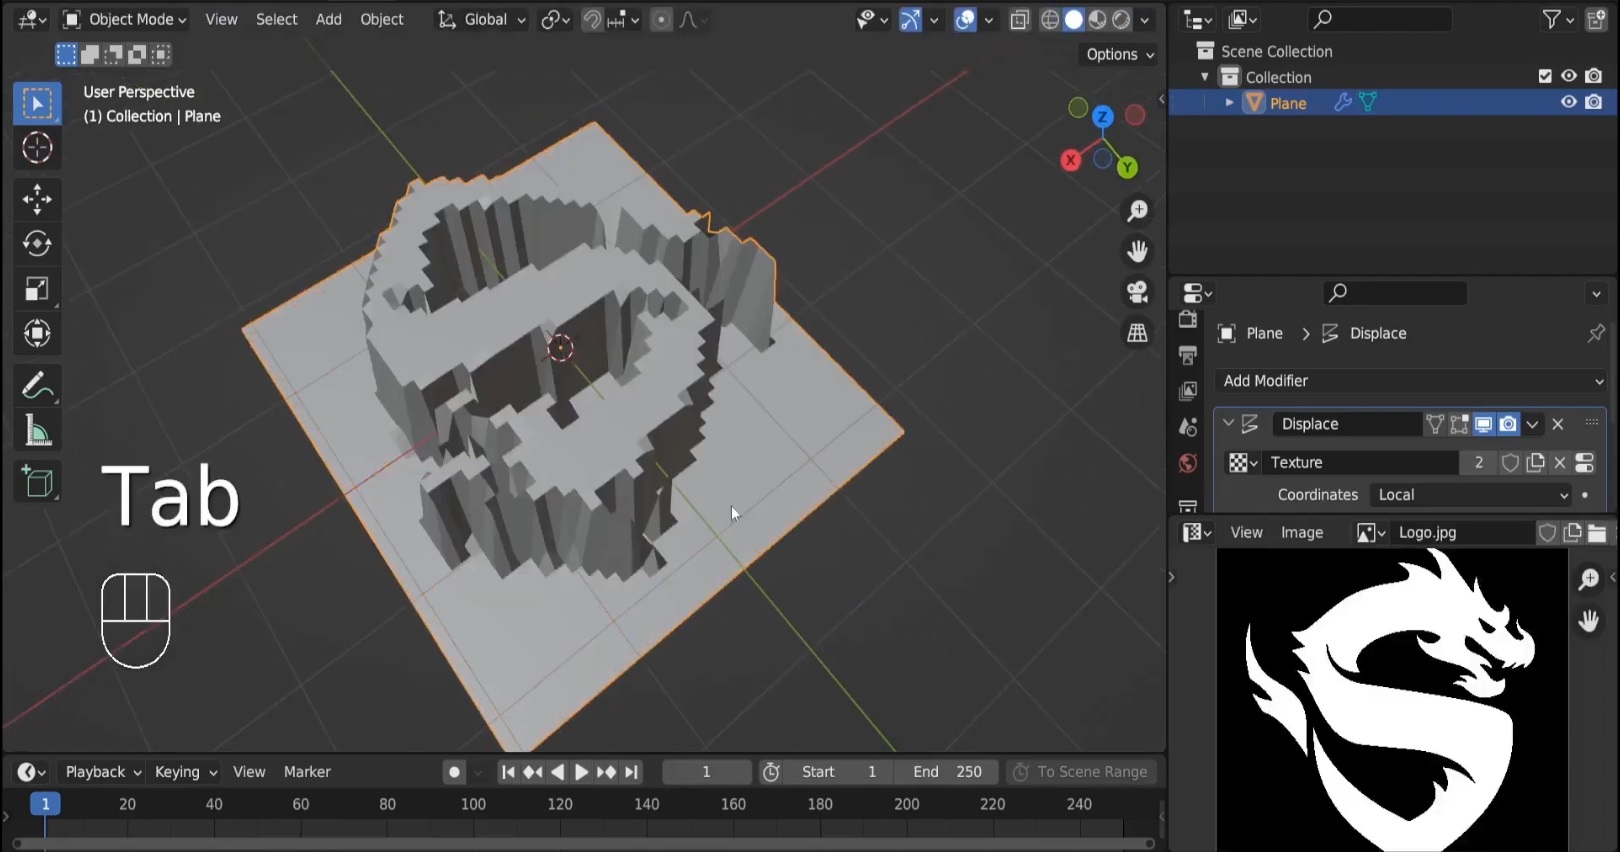
Step 7: Understand How the Displace Modifier Works
The Displace Modifier moves vertices based on the color of the texture:
- White Areas: Vertices are pushed outward (upward).
- Black Areas: Vertices are pushed inward (downward).
- Gray Areas: Vertices remain somewhere in between.
This effect mimics the 3D structure based on the light and dark areas of the image.
Step 8: Apply the Modifier and Finalize
Once the displacement looks correct:
- Apply the Modifier: In the Modifier Properties panel, click Apply to finalize the changes.
- Extract and Optimize Edges: To further refine the 3D model, you may want to extract edge lines or perform additional adjustments.
Screenshot Note: Show the plane after applying the displacement with a clean 3D look.
Conclusion
And that’s it! You’ve successfully converted a 2D image into a 3D object in Blender using the Displace Modifier without traditional modeling. This method is perfect for creating embossed logos, textures, or any other 3D assets based on flat images.

Click the button to start generating your download link…

2 Comments
Does the image being made into 3d have to be black and white or can we use colored images?
You can also use colored images but in PNG format