
Blender Tutorial – Delete all Materials with One Click (QUICK & EASY)
Step 1: Add a New Object to the Scene
To start, you’ll need to add a new object to your scene. This object will serve as the ‘blank slate’ for removing all materials.
- Add a New Object:
- Press
Shift + Ato bring up the Add menu. - Navigate to Mesh and select Cube (or any other object of your choice).
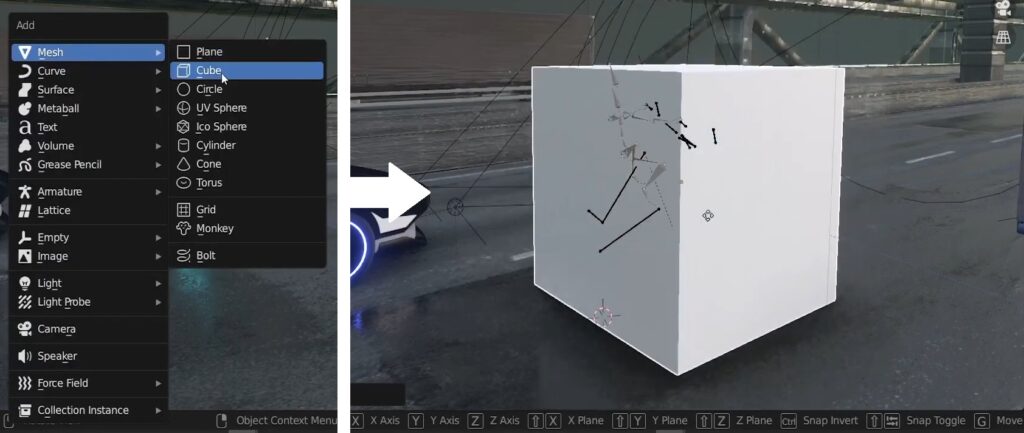
Screenshot of the Blender viewport showing the Add Mesh > Cube menu.
- Press
Step 2: Verify the Object’s Material Properties
Before proceeding, it’s important to ensure that the newly added object has no materials assigned to it.
- Check Material Properties:
- With the Cube selected, go to the Material Properties tab (the sphere icon).
- Confirm that no materials are listed.
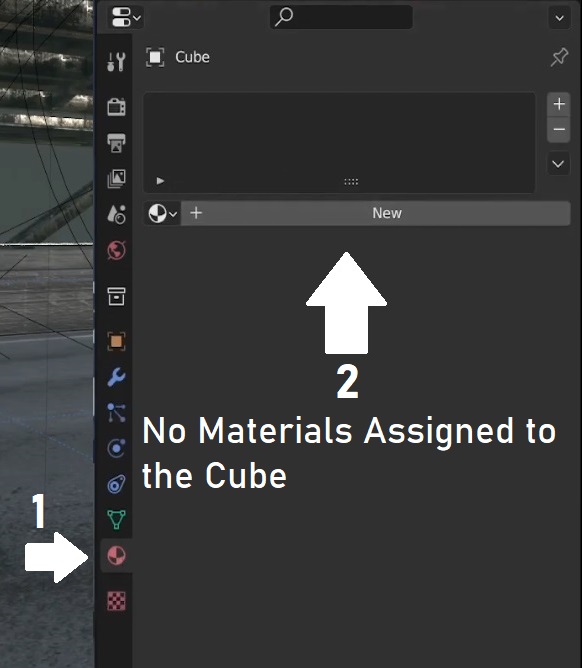
Screenshot of the Material Properties panel showing no materials assigned.
Step 3: Select All Objects in the Scene
Now that we have a material-free object, we can use it to clear the materials from every other object in the scene.
- Select All Objects:
- Press
Ato select all objects in the scene.
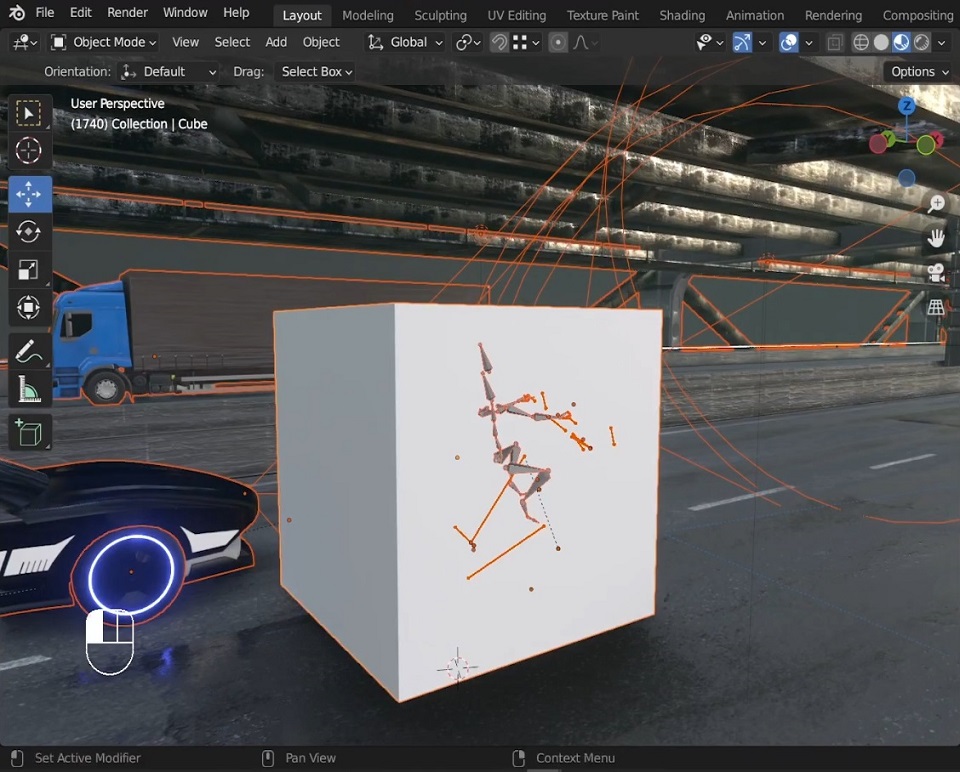
Screenshot showing all objects in the scene selected.
- Press
Step 4: Copy the Empty Material to All Objects
Here’s where the magic happens. By copying the empty material slot from the new object to all selected objects, we effectively remove all their materials.
- Copy Material to All Objects:
- With all objects selected, go back to the Material Properties tab.
- Click the dropdown menu and select Copy Material to Selected.
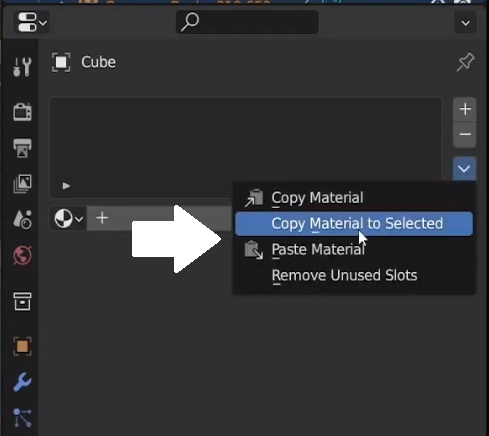
Screenshot of the Copy Material to Selected option in the Material Properties panel.
Step 5: Enjoy a Clean Slate
All materials in the scene should now be removed, leaving your objects ready for a solid render or whatever comes next in your project.
- Render Your Scene:
- Go ahead and render your scene to enjoy your clean, material-free objects!

Screenshot of a solid render output with no materials applied.
