Have you ever wanted to make your 2D images jump right off the screen? Our latest tutorial is here to show you exactly how to do that using Blender.
Step-by-Step Guide to 3D Magic
First, we start simple: drag your 2D image into Blender. This image is our starting point. Then, using Blender’s Grease Pencil, we trace over the image. It’s like drawing, but you’re setting the stage for something 3D.
Next, we clean up our drawing. We get rid of the parts we don’t need, making sure we’re left with just the important bits of our drawing. Think of it as tidying up your digital art space.
Then, it’s time to turn our drawing into a 3D shape, called a mesh. This mesh is like a digital clay model of your image. We fine-tune it, smoothing out the edges and filling in the gaps.
Adding the Details
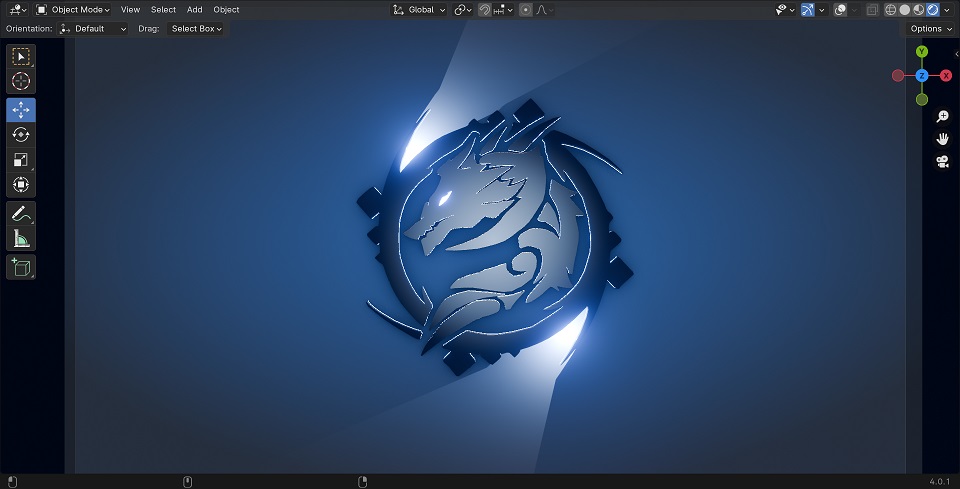
Now, the fun part: we give our dragon an eye! Using a tool called Boolean, we carefully cut out the eye. It’s like carving a sculpture.
We then use some cool tools in Blender to make our dragon look more real. We add thickness to it, fix how light shines on it, and soften the edges. These steps are like giving our dragon its skin and personality.
Ready to Explore 3D Modeling?
By the end of this tutorial, you’ll have a dragon that looks like it could fly off your screen! We’ve turned a flat image into a 3D model, and you can do it too.
Want to try it yourself? The project file is available for download on our website. Follow along, play around, and see what you can create.
This tutorial is just the start. Keep an eye out for more guides where we’ll dive deeper into making cool 3D models. Happy modeling, and remember, it’s all about having fun and being creative!
Download Dragon 2D Image
![]()
Download Final Project Files